
Imagine releasing a commemorative toy, mostly for children, and then slapping the URL of an adult website on the box.
If that fills you with anxiety, then you know how the marketing team at Mattel feels.
In 2024, toy giant Mattel made a mistake with its dolls associated with the film Wicked. Instead of directing buyers to the film’s website, Mattel pointed young consumers toward a site that was definitely NSFW, let alone safe for children.
The mistake was innocent, of course, as the two addresses are quite similar. But some parents were furious to learn that their curious kids were exposed to pornography (or could have been).
Beyond reputational damage, the error resulted in a $5 million class action lawsuit and the halting of sales by Amazon, Target, and Kohls until the packaging was adjusted.
Mistakes like these, however small, can have a dramatic effect on your business, so it’s critical that you have a content quality assurance framework in place to catch them before they ruin you.
A quality assurance framework will save your brand
Quality content is about great ideas and consistent execution. A QA framework makes that possible.
Publishing content at scale (whether that’s your website’s blog content, social media posts, webinars, or your product packaging) without a quality assurance framework is risky. It leads to inconsistencies, missed errors, and content that doesn’t meet your readers’ needs or support your goals.
When teams move fast without guardrails, small mistakes slip through, such as broken links, off-brand language, and accessibility gaps. Those kinds of mistakes chip away at user trust and performance.
And when that content is tied to a campaign or launch that needs to deliver ROI, the stakes are even higher.
A QA framework gives you structure. It turns content quality from a guessing game into a repeatable process. Instead of relying on last-minute fixes or post-publishing retractions, you can catch issues early and make sure every piece meets your standards before it goes live.
It also supports your larger strategy. A good QA framework keeps your branding consistent and serves your business goals. It keeps everyone on the same page as your team grows, whether you work in content, development and design, social media, or even fields like legal or government.
How to build a content QA framework
A content quality assurance framework is a structured process that includes standards and checkpoints that keep your content quality high. The goal is to make sure all of your content is published in a perfect state.
A good QA framework balances quality control and efficiency without creating bottlenecks. Once you put the system in place, your team should be able to stick to it and save time.
Step 1: Define what quality means
Before you can enforce quality, you need to define it. This means getting clear on what “good content” looks like for your organization and making sure everyone on your team understands those standards.
Start by documenting your content guidelines. This should include voice, tone, formatting, accessibility standards, branding, and any compliance requirements relevant to your industry.
These brand guidelines are the foundation for consistent, high-quality content, so be specific. Should your content sound formal or conversational? Should every article include a CTA? Should social posts stick to a certain length? The more detail you include, the less room for confusion later.
Next, align your standards with your business goals.
- If you care about engagement, define how you’ll measure it in terms of scroll depth, time on page, click-throughs, etc.
- If SEO is a focus, list the technical requirements: proper header structure, internal links, meta tags, alt text, and so on.
- For content meant to drive conversions, identify the aspects that matter most, such as message clarity and clear CTAs.

Finally, set technical standards to ensure your content performs. This includes page load times, mobile responsiveness, accessibility, and how content is stored, archived, or eventually removed.
Step 2: Build a content QA checklist
A strong QA checklist is your first line of defense against sloppy, off-brand, or underperforming content. This step turns your quality standards into clear, repeatable checks your team can follow every time.
Here are a few items that belong on every QA checklist:
- Grammar and spelling: Consistent punctuation and sentence structure help content feel polished. Use tools and human review to catch typos and grammar issues.
- Brand voice and tone: Make sure your content sounds like your brand. Check for consistency in voice, tone, and preferred language.
- Metadata and structured data: Confirm titles, descriptions, tags, and schema are accurate and aligned with your SEO and social goals.
- Internal and external links: Test all links. Make sure they work, go to the right place, and use clear, helpful anchor text.
- Accessibility: Check for alt text, heading structure, color contrast, keyboard navigation, and mobile readability.
- SEO: Review headers, keyword usage, meta tags, alt text, and URL structure. Make sure the content supports your SEO strategy.
- Visual and UX review: Confirm the layout looks good on all devices. Check fonts, spacing and image rendering, as well as how easily users can scan it.
Additionally, you’ll want to add some brand-specific items to your QA checklist. If you create medical content, you might require citations in a proper format at the end of each article. A quirky pet brand might require a fun emoji in each social media post.
Most importantly, remember that your checklist is a living document. Update it as your goals evolve, your tools improve, or new requirements emerge. The more you build these checks into your workflow, the less you’ll have to fix later.
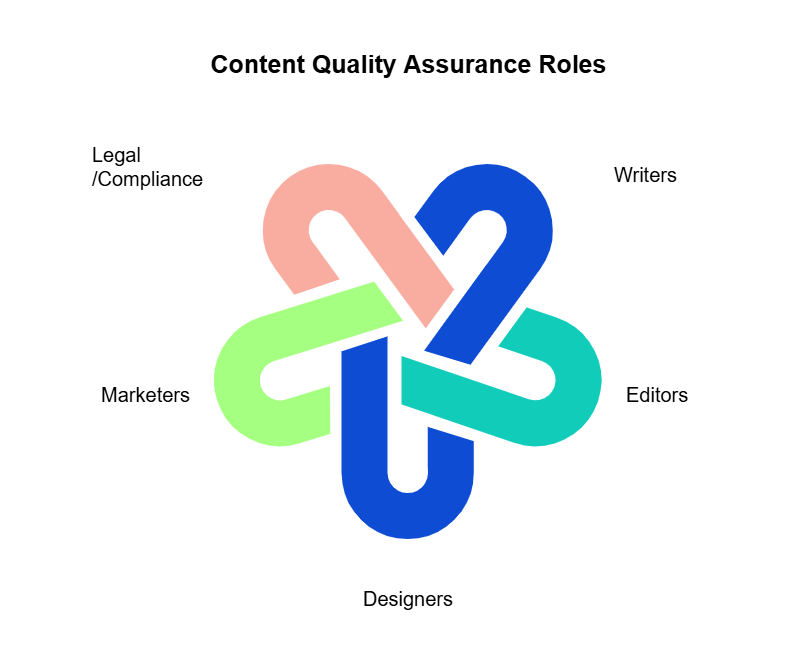
Step 3: Assign roles and ownership
Content quality is a team effort. Everyone involved needs clear roles and responsibilities to keep things moving and prevent last-minute confusion.
- Writers own the first draft and follow all content guidelines.
- Editors review for clarity, grammar, brand voice, and structure.
- Designers create visuals that align with brand standards and support the message.
- Marketers check messaging, strategy alignment, and performance readiness.
- Legal/compliance review high-risk or regulated content before it goes live.
Add checkpoints throughout your workflow to make sure content is reviewed at the right time. For complex or sensitive projects, use approval tiers: Light checks for routine content and heavier review for high-stakes campaigns.
We can’t say for sure, but this is probably where the team at Mattel dropped the ball. An editor should have typed that URL into their browser at some point to verify the address.
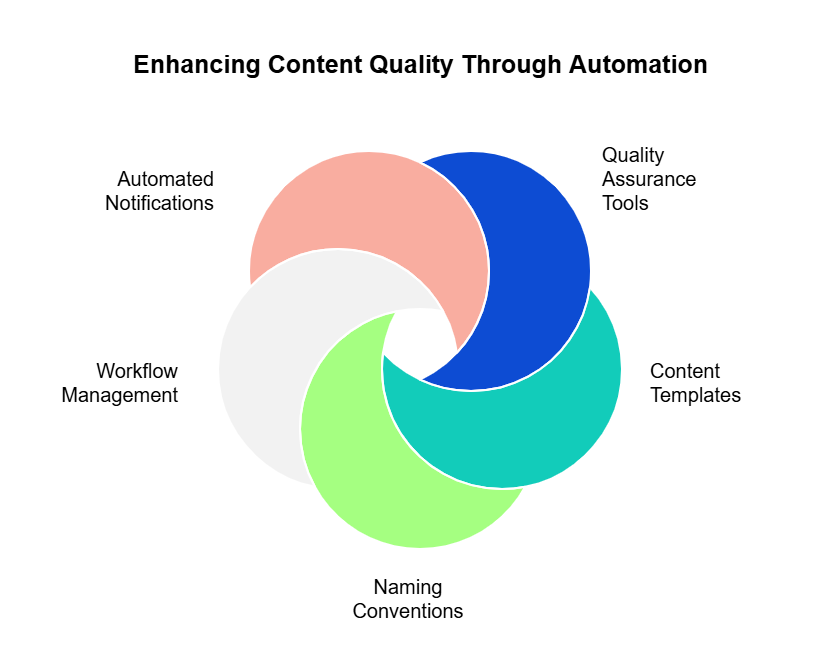
Step 4: Automate what you can
While it’s possible to manually check all of your content for quality issues, it’s hard to scale that way. Automated tools make this process much easier so your team can focus on more important work. Plus, automated checks tend to catch more quality issues than humans do.
Fortunately, there are a lot of ways to use automation to keep your content quality high.
- Use a quality assurance tool like Siteimprove to scan for broken links, spelling and grammar mistakes, SEO gaps, and accessibility problems.
- Build templates for landing pages, blog posts, and emails that include formatting, tone, and structural guidance. Pair these with a digital style guide.
- Set rules for naming files, campaigns, and content versions. This makes assets easier to find and prevents duplication or versioning errors.
- Use your CMS or DAM system to manage workflows, track edits, and log approvals..
- Set rules in your project management tools to automatically assign content for review once it hits a certain stage. For example, a draft can auto-notify an editor or legal reviewer when it’s ready.
This is another area where you’ll need to think critically about the content you produce and use the right tools for the job.
For example, if you produce social media content you might use a scheduling tool that blocks out bad times to post. If you build interactive pages, you might need a tool that checks for performance in different browsers.
Step 5: Make QA part of your workflow
A content QA framework only works if it’s built into the way your team operates. It can’t be an extra step at the end or something you do “when there’s time.” Quality assurance needs to be part of your process from the very beginning.
That means every project should follow a repeatable workflow, with QA checkpoints clearly mapped out. Drafts should be reviewed at specific stages — after writing, after design, and before publishing. Everyone involved should know when their input is needed and what they’re responsible for checking.
Use your content calendar to schedule time for QA, not just content creation. Build review windows into your deadlines. If you’re producing evergreen content, set reminders for post-publish reviews to make sure it stays accurate and up to date.
By making QA a regular part of your content lifecycle, it becomes second nature. The result is a faster process, fewer errors, and more confidence in every piece you publish.
Step 6: Measure and improve
Your QA framework isn’t set in stone. It should evolve as your team, tools, and content needs change. This means you’ll need to measure how it’s working and where it’s falling short.
Start by tracking metrics like error rates, review times, and how content performs after publishing. Are you seeing fewer mistakes? Are pieces moving through the process more efficiently? Is content hitting its goals more consistently?
You can also track your content’s credibility and usability using Siteimprove’s Quality Assurance Score. The tool even offers prioritized suggestions to improve your score.
Talk to your team: editors, writers, and designers. They’ll tell you where things slow down, what gets missed, and what needs to change.
As your team grows or takes on more complex projects, revisit and update your checklist. Add new review steps if needed. Remove ones that are no longer useful.
Step 7: Incorporate human feedback
Automation and checklists can catch a lot, but your audience sees things your tools can’t.
Human feedback is essential. It gives insight into how your content is received by your audience, including what is and isn’t working. (But hopefully that feedback isn’t thousands of negative social media, products pulled off shelves, and a multi-million-dollar lawsuit.)
Pay attention to the feedback you get through comments, support tickets, surveys, or direct responses. Look for patterns.
If readers are regularly confused by a certain section or asking the same follow-up questions, that’s a clear sign something needs to change. Maybe the writing needs to be clearer, or maybe you’re assuming too much background knowledge.
User feedback helps you close the gap between your intent and your audience’s experience. When you actively listen and adjust based on real input, your content gets stronger, more useful, and more aligned with your goals.
Quality from the start
A custom content QA framework helps you publish better content with fewer errors. It gives your team a clear process to follow so quality is built in from the start.
Start small. Create a checklist. Assign roles. Automate what you can. Then iterate. The best QA processes evolve with your content strategy, your team, and your goals.
As new trends emerge — like AI-assisted editing, conversational search optimization, and omni-channel experiences — your framework will need to adapt. Keep an eye on what’s coming and fold it into your process when it makes sense.